AI zombie video
Source clip
The zombie love story. Your characters. Your version.
Add a clip to estimate credits
Review the cost before you generate.
Make an AI zombie video from a clip you love and the characters you want in it. Start with a zombie love story reference, add character images, and use Motion Transfer or Object Swap to direct the change. Your source provides the action and story timing, so you can get straight to casting your version.
The AI zombie video trend is a short emotional story: someone recognises a loved one who has turned into a zombie, hesitates instead of attacking, and the scene cuts to a happy memory. The contrast between a frightening present and an ordinary moment of affection is what gives the zombie love story its shape. A still zombie filter changes a face; this format depends on a sequence of shots.
To make your version, first decide which part matters most: the recognisable characters, the approach and embrace, or the cut into a sunlit memory. In a video-based workflow, the source already contains those choices. Character references give the model an appearance to work toward while the clip supplies movement, framing and timing.
Genjutsu AI is an AI zombie video generator for transforming existing footage. Bring a source video and reference images, then choose a broad recast with Motion Transfer or a focused replacement with Object Swap. If you have only two photos and want a completely new story, you will first need a source clip or a separate image-to-video workflow.
Choose Motion Transfer when the performance is your starting point. Your AI zombie video might follow a slow approach, a surprised reaction or an embrace already present in the clip. Add images of your original characters and describe how they should appear in the scene. This gives you a quick starting point for recasting a sequence without writing every camera move from scratch.
For a zombie love story with two people, name their roles clearly: the survivor and the person who turns. Assign one reference to each role and add stable visual details such as hairstyle, jacket colour and position in the opening shot. If the source includes a flashback, explain that the same character appears healthy in the memory.
The source guides the motion and timing; exact faces, gestures, camera paths and cuts can still vary. Start with a short passage where the characters are easy to distinguish. Watch the entire result before extending the idea to a longer scene.
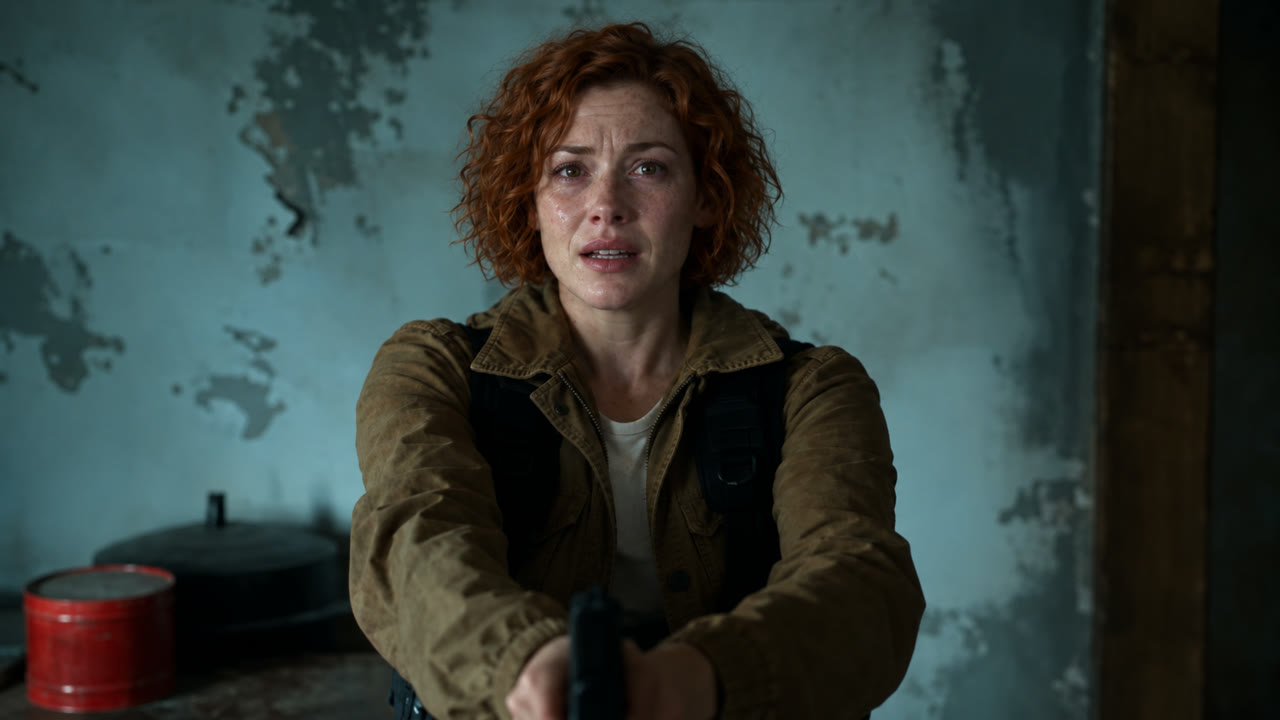
Choose Object Swap when you like the room, other character and overall composition, and want to change a selected subject. For example, replace the survivor with your reference character while asking the model to keep the approaching zombie and background consistent. The three images below show this kind of focused casting decision.
Write the target into your AI zombie video prompt using both role and visible details. ‘Replace the survivor in the olive jacket’ is easier to interpret than ‘change her’, especially when the camera cuts between people. State whether the replacement applies to the memory sequence as well, and provide a reference that clearly shows the intended face and outfit.
Object Swap is a targeted edit, but neighbouring details may change. Check hands, overlapping bodies, hair edges and interactions between the two people. If the brief becomes hard to describe, choose a shorter shot and solve one replacement at a time.
| What you want to make | Starting point | Suggested workflow |
|---|---|---|
| A new cast following an existing zombie scene | Source video + character references | Motion Transfer |
| One replacement character in a scene you already like | Source video + a clear replacement image | Object Swap |
| A complete story from only two photos | Photos, with no source footage | Create or choose a source clip first; Genjutsu AI requires video |
Source video frame AI-generated character reference Illustrative recast · AI-generated still
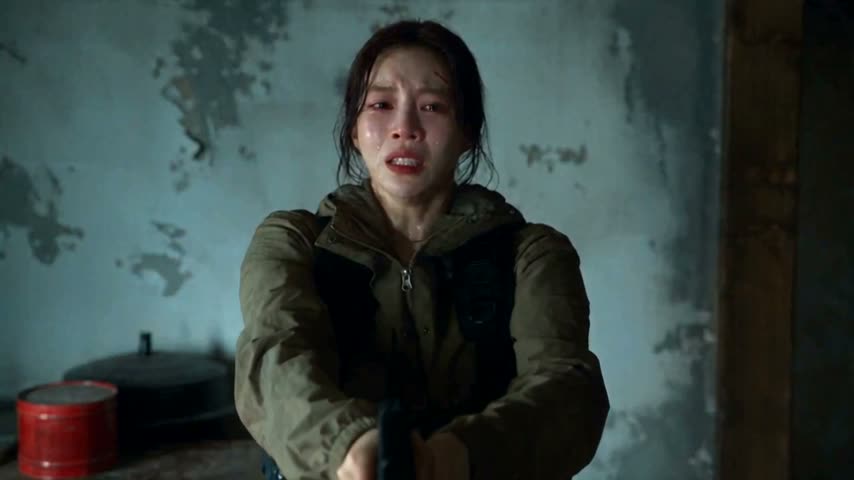
The tool at the top of this page starts with a source clip and an applied, editable Motion Transfer prompt at 480p. Add your own reference images. Use the video control to choose a supplied clip or your own footage. The full clip stays selected until you use Edit clip to change its duration or framing; you can prepare these inputs before signing in. Recreate and the final “Create my AI zombie video” button open the full workspace.
Use Edit clip to select a 4–30 second passage and preview the crop. A short, clear shot is a useful first test. Keep the survivor and the approaching character in frame, and include the memory transition only if it is part of the scene you want to transform.
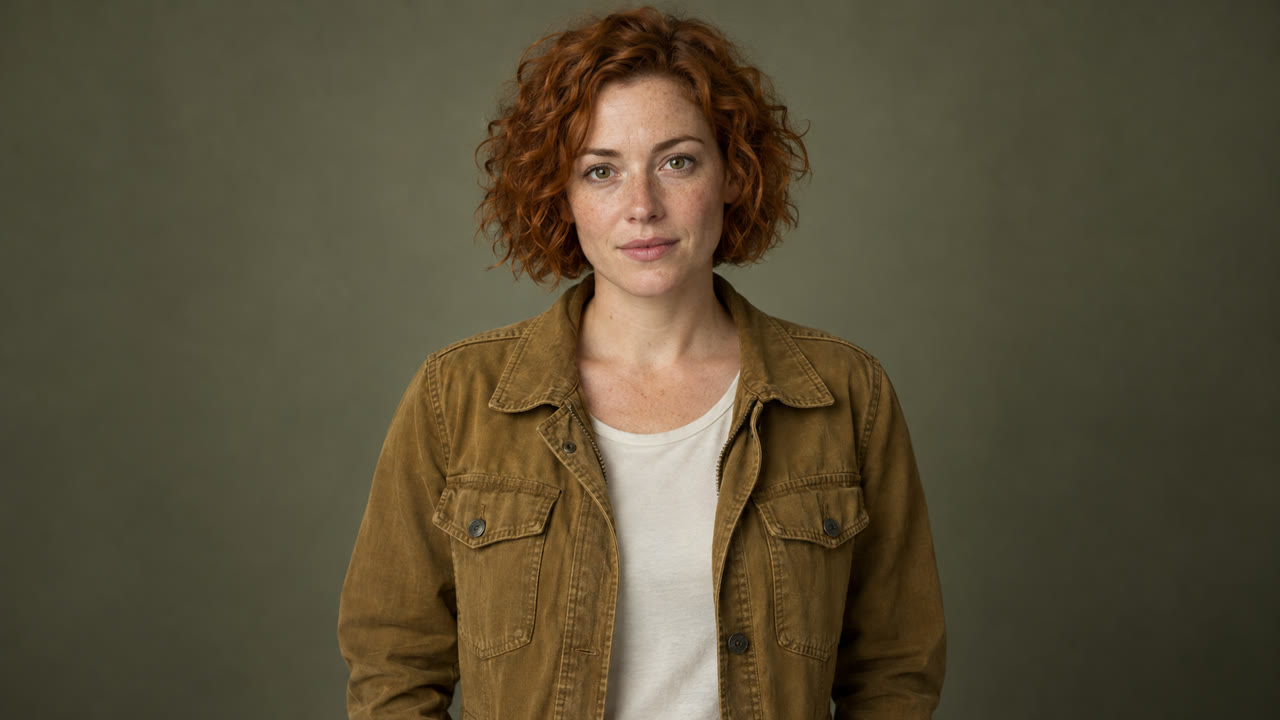
Upload one to eight reference images. For one replacement, start with a clear image of the new character. For two people, use separate images and explain which one is the survivor and which one becomes the zombie. Clear lighting, visible facial features and distinct outfits make that brief easier to communicate.
Select Motion Transfer for a broader reinterpretation or Object Swap for a focused change. Adapt one of the prompts below to your actual footage. Describe the appearance and emotion you want, including a non-graphic zombie look if that suits your story.
Choose 480p or 720p, then Generate. Sign in if prompted to get the confirmed quote for your prepared clip. Check the inputs and credits, add credits if needed, then choose Confirm & generate when ready. Signing in or paying does not start generation. The prepared clip’s duration determines the cost, rounded up to a whole second. Loading a reference clip does not generate an AI zombie video or spend generation credits.
When the result is ready, compare the faces, clothing, movement and transition with your brief. Check the moment where characters overlap, not just the opening frame. Download the version you want to keep, then finish captions and audio in your editing or publishing workflow.
Visual walkthrough: one source frame, a new character reference and an AI-generated edit of that frame. The final image illustrates the intended change; it is not a generated video result.
The Motion Transfer example below is already applied in the tool at the top. Edit it to match your images. Switching to Object Swap keeps your current text, so replace or adapt the prompt for that mode. Start with the change you want the model to make. These prompts are editable examples, not pretested recipes. Match the role names and clothing to your source, then remove anything that asks for an action or transition the clip does not contain.
Recast the two adults in the source video using my character references. Reference 1 is the survivor; reference 2 is the person who has turned into a zombie. Follow the source’s approach, reactions, movement and camera timing. Keep the two identities distinct through each shot. Give the transformed character pale skin and a subtly unsettling gaze, without graphic wounds. If the source includes a warm memory, show that same character healthy in the memory. Retain the emotional contrast and avoid extra characters or new cuts.
For your first AI zombie video, use a short sequence with clearly visible faces. Matching the requested story to the source is more useful than adding a long list of unrelated cinematic effects.
Replace only the adult survivor in the olive jacket with the adult character in my reference image. Use the reference face, short copper curls and ochre jacket. Match the target’s pose, scale, expression and scene lighting. Keep the other character, room and camera framing as consistent with the source as possible. Apply the same identity to the survivor wherever that person appears in the selected clip. Do not add people, graphic injuries or new scene transitions.
This prompt matches the illustrated character change. Rewrite the target description if you use another source. A prompt describes the intended edit; it does not guarantee a frame-identical result.
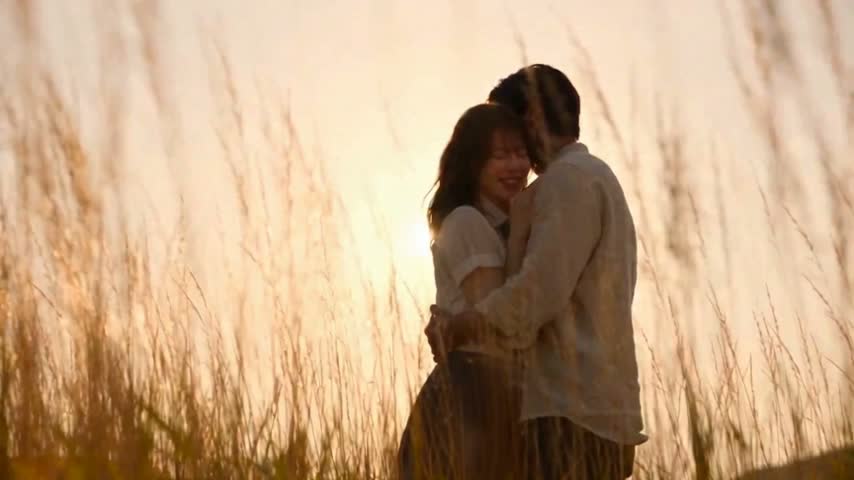
An AI zombie video needs room for the relationship between its characters. Before choosing a vertical crop, watch the whole passage. A face that starts in the centre may move to an edge during the approach or embrace. Check both the frightening scene and the warm memory, because their compositions may differ.
For TikTok, Reels or Shorts, preview how your landscape footage will fit inside a vertical layout. If cropping removes a key person, keep the wider picture and arrange it on a vertical canvas in your editor. Cropping does not invent missing space. For Object Swap, the prepared source needs at least 409,600 pixels per frame; a tight crop can fall below that requirement.
Let expressions and contrast carry the emotion. A restrained zombie transformation, an unreadable stare and a recognisable memory can communicate the story without graphic injuries. Review the final edit against your intended audience and the destination platform’s current rules before posting.
Buy a credit pack once. See the cost before every generation, with the same rates for Motion Transfer and Object Swap.
—
one-timeUSD · one-time payment
One-time credit pack
480Credits
480p · up to 8s total
Up to 8s total at 480p
720p needs at least 520 credits
720p needs at least 520 credits
—
one-timeUSD · one-time payment
One-time credit pack
1,000Credits
480p · up to 16s total
Up to 16s total at 480p
720p · up to 7s total
Or up to 7s total at 720p
—
one-timeUSD · one-time payment
One-time credit pack
1,500Credits
480p · up to 25s total
Up to 25s total at 480p
720p · up to 11s total
Or up to 11s total at 720p
—
one-timeUSD · one-time payment
One-time credit pack
3,300Credits
480p · up to 55s total
Up to 55s total at 480p
720p · up to 25s total
Or up to 25s total at 720p
A 10-second clip uses 600 credits at 480p or 1,300 at 720p.
480p: 60 credits/sec · 720p: 130 credits/sec
Pack allowances are alternative uses of one balance and can cover multiple clips. Each clip must be 4–30 seconds. Combine packs for longer clips or 720p.
Pricing and billing detailsOne-time credit packs. A quote for your chosen clip.
An AI zombie video uses the same Genjutsu AI rates as other transformations: 60 credits per billed second at 480p or 130 at 720p. Duration rounds up to the next whole second. A 4.2-second clip is billed as five seconds; your quote reflects the prepared source and selected quality.
| Video duration | 480p | 720p |
|---|---|---|
| 4 seconds | 240 credits | 520 credits |
| 5 seconds | 300 credits | 650 credits |
| 10 seconds | 600 credits | 1,300 credits |
| 20 seconds | 1,200 credits | 2,600 credits |
Coverage below uses base credits; any eligible first-purchase bonus is shown separately. Check your balance against the confirmed quote. The lowest-priced pack is — for 480 credits. It can cover a short 480p test, but it does not cover the minimum four-second 720p generation. The preloaded source is about 20 seconds, so trim it if you want a smaller first test. Review current credit packs and the actual confirmed quote before confirming. A successfully generated revision is a new generation; budget for another attempt if you change your direction.
Choose by your starting material. If you want a fixed story generated from two photos, look for a photo-to-video tool that explains its template and output settings. If you already have a clip and want to recast it, Genjutsu AI offers Motion Transfer and Object Swap. Compare the required inputs, duration, price and real examples before paying.
Genjutsu AI needs a source video as well as reference images. Two photos can define two characters, but they do not provide the motion for this workflow. Start with a supplied source clip or upload your own, then add the photos and assign each character a role.
Yes. Object Swap lets you request a selected replacement using a source video, reference image and target description. Identify the person by role and visible details. Check the rest of the scene after generation, especially where that person overlaps the other character or passes behind an object.
Use separate, clear references and consistent role names. Give the survivor and transformed character different visible identifiers, then keep those assignments the same in the prompt. Shorter shots with less occlusion are easier to evaluate. Identity can still drift across cuts, so inspect the entire AI zombie video before choosing a final version.
The source guides the transformation, but frame-exact movement, camera timing and original audio are not guaranteed. Motion Transfer and Object Swap should be evaluated on the delivered file. Review sound separately and add or align music you are entitled to use in your editor if needed.
You can browse examples and prepare your creative direction, but generation uses paid credits. Genjutsu AI sells one-time credit packs and shows a quote before generation. The cost depends on the prepared clip’s rounded-up duration and selected quality, so a shorter clip generally needs fewer credits at the same resolution.
You can request a restrained transformation using pale skin, unusual eyes and a tense expression rather than graphic wounds. Choose appropriate source footage and make that direction explicit in the prompt. Review the output and the platform’s current rules; a prompt cannot guarantee either the generated imagery or acceptance by a social platform.
The three videos are supplied trend references. The how-it-works sequence uses a frame from one clip, an AI-generated character reference and an illustrative edited still. They show the source-led workflow and intended character change, rather than serving as verified Genjutsu AI video results. Visit our linked video case study for a separate example.

Start with a story beat that matters to you. Choose the survivor, choose who turns, and give the scene a new cast with Motion Transfer or Object Swap. Your source clip and starting prompt are ready in the tool above; add your references and make the next creative decision.
Create my AI zombie video